前提
- nodeの開発環境が整っている
- githubにリポジトリが作成済み
Firebaseの準備
Firebaseの設定は比較的簡単です。
この記事をご覧の方は対象者かと思いますが、サーバーレスのWebアプリケーションを構築する方法と、GitActionsを利用したデプロイ方法を説明していきます。
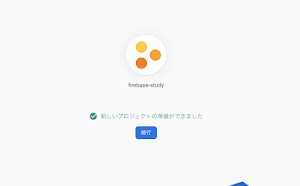
プロジェクトを追加する
とりあえず、firebase-study という名前で追加しておきましょう。
続行を押して次へ進みます。

今回、Analyticsは必要ないので無効にし、プロジェクトを作成します。

続行を押してプロジェクトを追加します。
WEBアプリを追加
作成したプロジェクトにWEBアプリを追加していきます。
※ 一つのプロジェクトに対し、複数のWEBアプリを追加可能

適当な名前をつけて、アプリを登録します。(ここでhostingを設定しても大丈夫です)

こちらの構成を控えておきましょう。

実装
私の手元にある作業用PCがMacなので、ターミナルで進めていきます。
プロジェクトを作る
ガシガシ入力していきましょう
- プロジェクトを作成したいディレクトリ配下で入力
$ yarn create-nuxt-app firebase-study - プロジェクト名を
firebase-studyのままEnter - TypeScriptを選択
- Package managerを
yarnにする - UI framework: 見栄えがいいので
Vuetify.jsにする - Nuxt.js modules, Linting tools, Testing frameworkはとくに設定せず
- Rendering mode: をSSR/SSGに(今回はSPAでも大丈夫です)
- username: 自分のGitアカウントが設定されていることを確認してください。
- Version control system: Gitを選択
create-nuxt-app v3.7.1
✨  Generating Nuxt.js project in firebase-study
? Project name: firebase-study
? Programming language: TypeScript
? Package manager: Yarn
? UI framework: Vuetify.js
? Nuxt.js modules: (Press <space> to select, <a> to toggle all, <i> to invert se
lection)
? Linting tools: (Press <space> to select, <a> to toggle all, <i> to invert sele
ction)
? Testing framework: None
? Rendering mode: Universal (SSR / SSG)
? Deployment target: Static (Static/Jamstack hosting)
? Development tools: jsconfig.json (Recommended for VS Code if you're not using
typescript)
? What is your GitHub username? yutahhh
? Version control system: Git
無事にプロジェクトが作成できたので、動かしてみましょう。
$ cd firebase-study
$ yarn dev
Firebase Hosting の設定
ここからは、ローカルとFirebase Consoleを行ったりきたりしますよ!
Firebase Console に戻り、Firebase Hostingの設定をしていきます。

- サイドバーの、
構築->Hostingから「始める」を押してください。 - terminalへ戻り下記コマンドを入力
$ npm install -g firebase-tools - ローカル環境のルートディレクトリで下記コマンドを実行していきます。
$ firebase login# ブラウザが開くので、Firebaseを使用中のアカウントで認証していきます。
$ firebase init
今回はHostingへの配信(のみ)を考えているので
Hosting: Configure files for Firebase Hosting and (optionally) set up GitHub Action deploys
Hosting: Set up GitHub Action deploys
が対象となります。
? Which Firebase features do you want to set up for this directory? Press Space to select features, then Enter to confirm your choices. (Press <space> to select, <a> to toggle all, <i> to invert se
lection, and <enter> to proceed)
 ◯ Firestore: Configure security rules and indexes files for Firestore
 ◯ Functions: Configure a Cloud Functions directory and its files
❯◉ Hosting: Configure files for Firebase Hosting and (optionally) set up GitHub Action deploys
 ◉ Hosting: Set up GitHub Action deploys
 ◯ Storage: Configure a security rules file for Cloud Storage
 ◯ Emulators: Set up local emulators for Firebase products
先ほどFirebase Consoleにてプロジェクトを作成したので、Use an existing projectを選択します。
プロジェクト一覧が表示されるので、作成したプロジェクト名を選びます。
? Please select an option:
❯ Use an existing project
  Create a new project
  Add Firebase to an existing Google Cloud Platform project
  Don't set up a default project
Setup
以下のように設定していきます。
? What do you want to use as your public directory? dist
? Configure as a single-page app (rewrite all urls to /index.html)? Yes
? Set up automatic builds and deploys with GitHub? Yes
? For which GitHub repository would you like to set up a GitHub workflow? (format: user/repository) yutahhh/firebase-study
? Set up the workflow to run a build script before every deploy? No
? Set up automatic deployment to your site's live channel when a PR is merged? Yes
? What is the name of the GitHub branch associated with your site's live channel? main #GitHubの本番用ブランチ
以下を実行し、ホスティングの設定を完了すると、リリース履歴に自分のアカウントが表示されているかと思います。
$ firebase deploy
※ まだプロジェクトの中身は空っぽです
開発環境の設定
続いて、ローカルのSetupです。
以下のコマンドを実行し、ローカルにFirebaseを設定していきます。
$ mkdir plugins
$ touch .env
$ touch firebase.ts
$ yarn add firebase firebase-tools
各ファイルの中身を記載していく
.env
FB_API_KEY = xxxxxxxxxx # 先ほど控えていた構成値の apiKey
FB_PROJECT_ID = fir-study-42747 # 先ほど控えていた構成値の projectId
FB_MESSAGING_SENDER_ID = 000000000 #先ほど控えていた構成値の messagingSenderId
FB_APP_ID = 1:0000000.... # 先ほど控えていた構成値の appId
firebase.ts
import { FirebaseOptions, getApps, getApp, initializeApp, FirebaseApp } from 'firebase/app';
import { FirebaseApp, FirebaseOptions, getApp, getApps, initializeApp } from '@firebase/app'

const firebaseConfig: FirebaseOptions = {
  apiKey: process.env.FB_API_KEY,
  authDomain: process.env.FB_PROJECT_ID + '.firebaseapp.com',
  projectId: process.env.FB_PROJECT_ID,
  storageBucket: process.env.FB_PROJECT_ID + '.appspot.com',
  messagingSenderId: process.env.FB_MESSAGING_SENDER_ID,
  appId: process.env.FB_APP_ID,
}

export const firebaseApp: FirebaseApp = !getApps().length ? initializeApp(firebaseConfig) : getApp();
GitActionsの設定
続いて、先ほど設定した.envファイルの中身を Git Actionsで使用するsecretsに設定していきます。
まずGitHubのリポジトリへ移動し、画面上部の Setting -> 左側の Secrets and variables -> Actions を選択
New repository secret から、環境変数を設定していきます。
Name: ENV_PRD
Secret: .env の中身を丸々コピペ

自動デプロイ
以下2つのworkflow構成ファイルが自動生成されていると思います。
ここに環境変数の設定, 静的ホスティング用の変更を加え、自動デプロイのロジックを完成させていきます。
.github/workflows/firebase-hosting-merge.yml.github/workflows/firebase-hosting-pull-request.yml
workflowの修正
.github/workflows/firebase-hosting-merge.yml
# This file was auto-generated by the Firebase CLI
# https://github.com/firebase/firebase-tools

name: Deploy to Firebase Hosting on merge
'on':
  push:
    branches:
      - main
jobs:
  build_and_deploy:
    runs-on: ubuntu-latest
    steps:
      - uses: actions/checkout@v2
      - name: Create .env file
        run: |
          touch .env
          echo "${{ secrets.ENV_PRD }}" > .env
      - run: yarn install && yarn generate
      - uses: FirebaseExtended/action-hosting-deploy@v0
        with:
          repoToken: '${{ secrets.GITHUB_TOKEN }}'
          firebaseServiceAccount: '${{ secrets.FIREBASE_SERVICE_ACCOUNT_FIR_STUDY_42747 }}' # firebase init により自動設定される環境変数です
          channelId: live
          projectId: fir-study-42747
.github/workflows/firebase-hosting-pull-request.yml
# This file was auto-generated by the Firebase CLI
# https://github.com/firebase/firebase-tools

name: Deploy to Firebase Hosting on PR
'on': pull_request
jobs:
  build_and_preview:
    if: '${{ github.event.pull_request.head.repo.full_name == github.repository }}'
    runs-on: ubuntu-latest
    steps:
      - uses: actions/checkout@v2
      - name: Create .env file
        run: |
          touch .env
          echo "${{ secrets.ENV_PRD }}" > .env
      - run: yarn install && yarn generate
      - uses: FirebaseExtended/action-hosting-deploy@v0
        with:
          repoToken: '${{ secrets.GITHUB_TOKEN }}'
          firebaseServiceAccount: '${{ secrets.FIREBASE_SERVICE_ACCOUNT_FIR_STUDY_42747 }}' # firebase ini...
コメント